
Outlook に設定した際に、受信フォルダーなどが英語表記になっている場合の対処方法をご案内します。
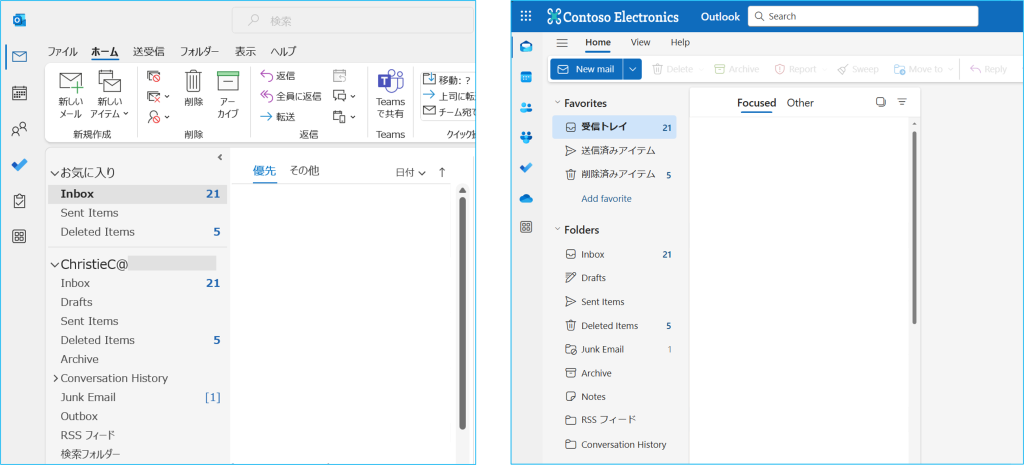
誤って表示されている場合は、英語・日本語が混在しています。
Outlook や Outlook on the web で見ると、以下の様に表示されます。
1.下記の URL へアクセスし、Outlook on the web にサインインします。
https://outlook.office365.com/
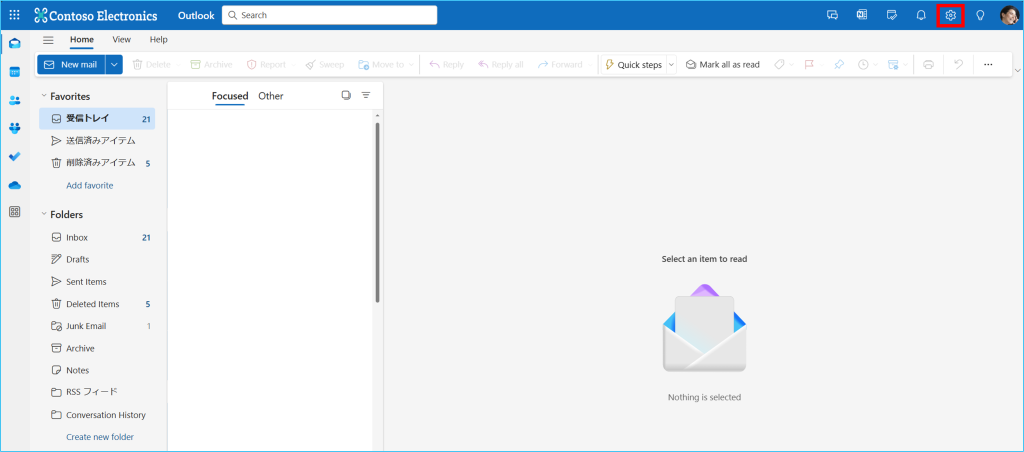
2.サインインができましたら、画面右上の【設定(歯車)アイコン】をクリックします。
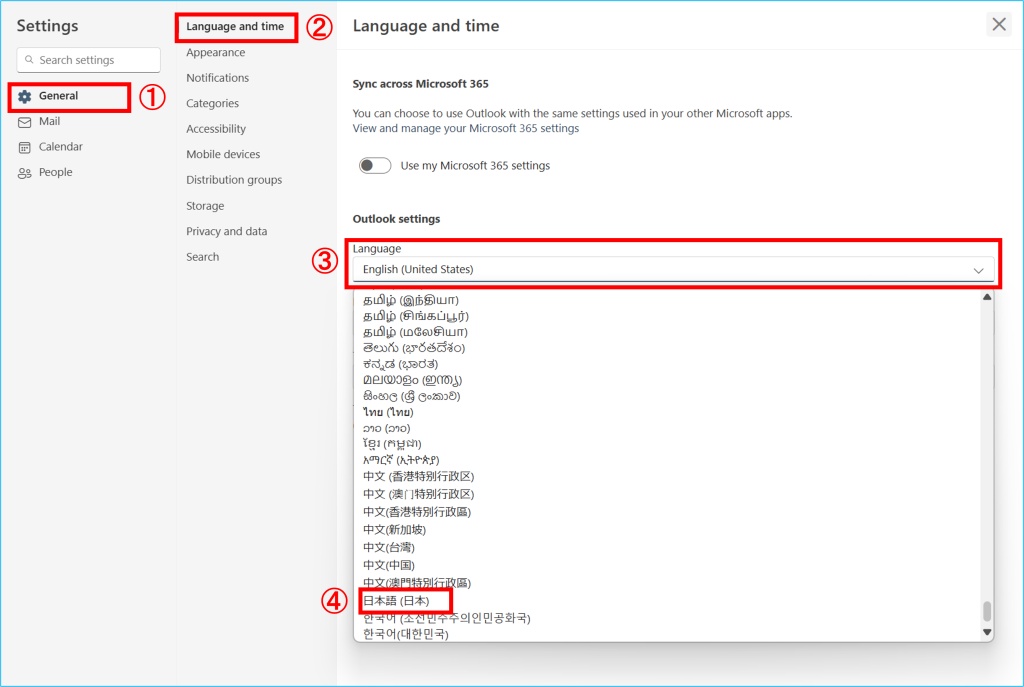
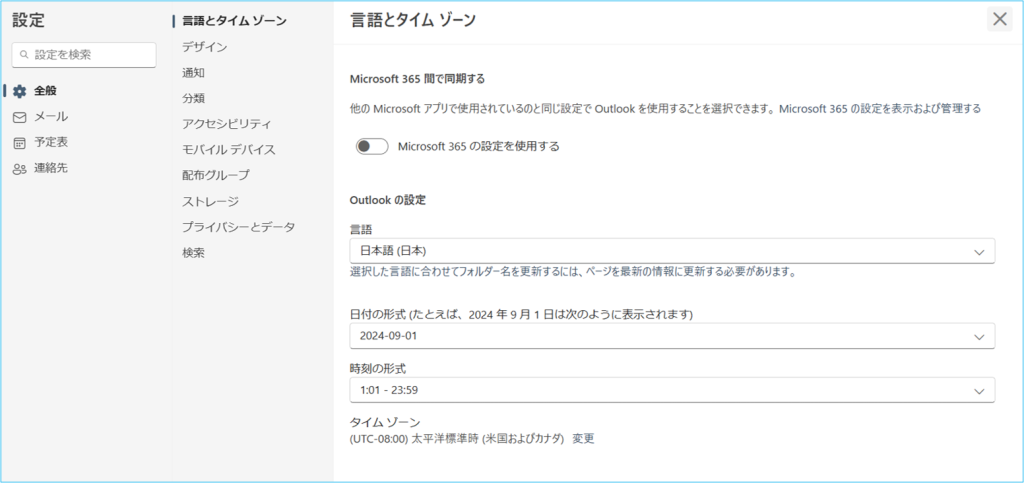
3.『Settings』の画面が開きます。画面左側の①【General】をクリックし、②【Language and time】を選択し、③Language の【ⅴ】をクリックします。表示されたプルダウンの中から④【日本語(日本)】を選択します。
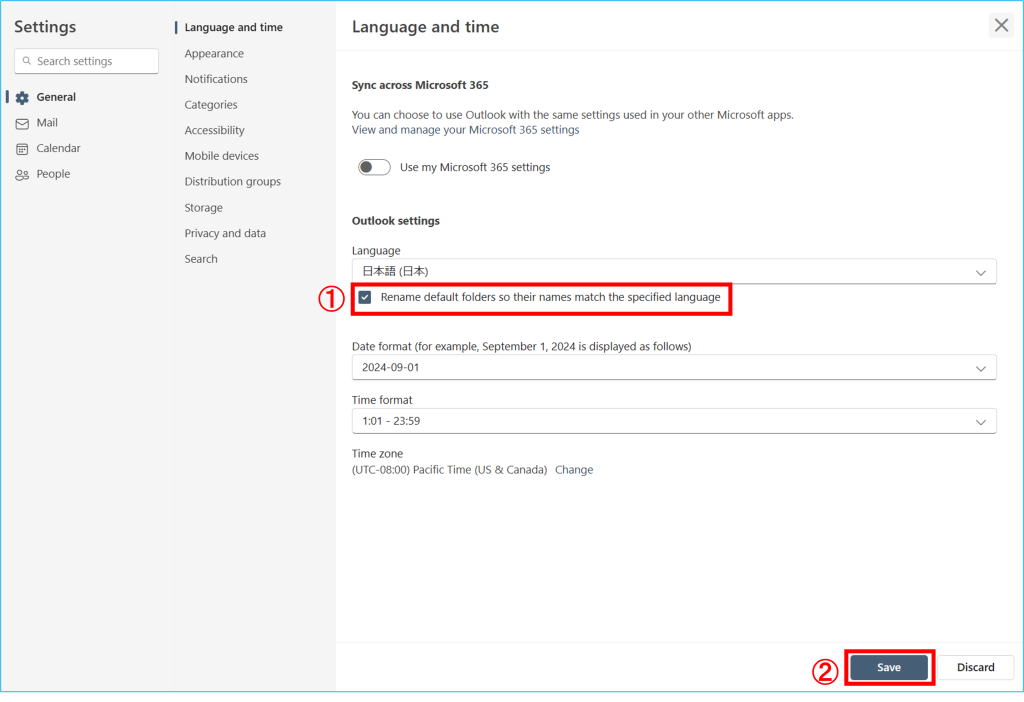
4.変更内容および ①「Rename default folder so their names match the specified language 」にチェックが入っている事を確認して、②【Save】をクリックします。表示が以下の様に英語から日本語に変わりましたら変更完了です。
※タイムゾーンの変更についてはこちらをご確認ください。